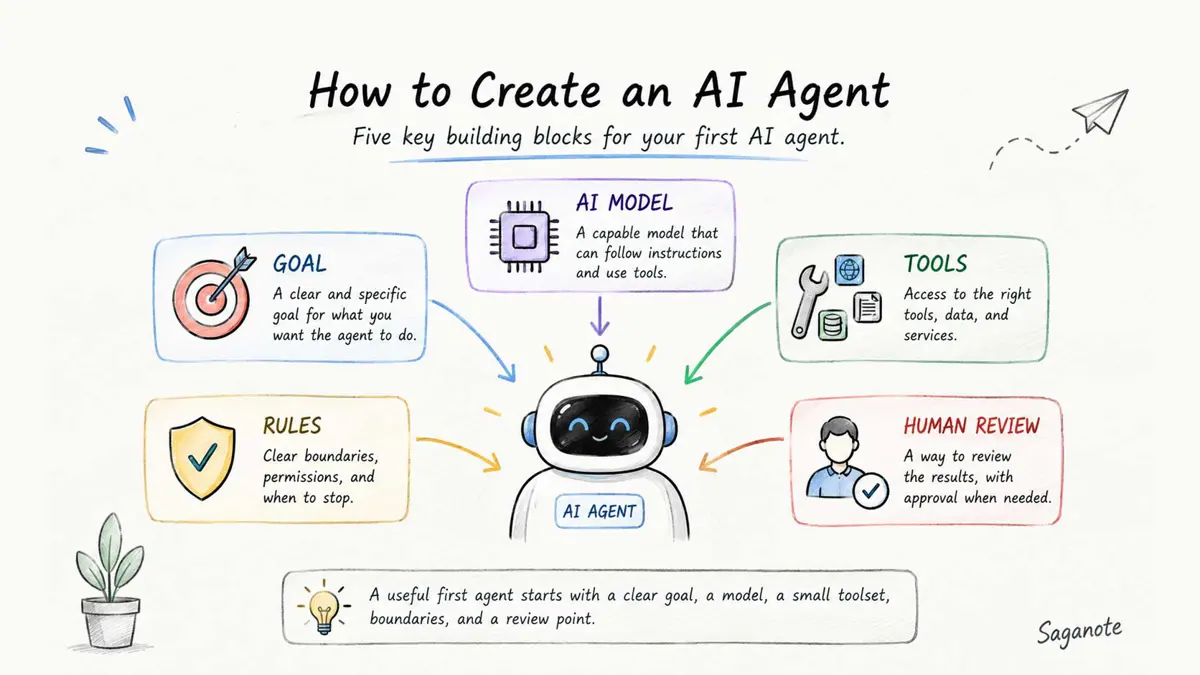
If you want to create an AI agent, you do not need to begin with a complicated multi-agent system. A useful first agent can be a small program that receives a goal, decides whether it needs a tool, uses that tool, and returns a result. This guide shows how to build that kind of first project with Python and the OpenAI Agents SDK.
What You Need to Create an AI Agent
Keep the first project small. You need:
- Python 3.10 or newer
- An OpenAI API key
- The OpenAI Agents SDK
- A small task with a clear finish line
- A rule for what the agent may and may not do
Keep your API key out of source code and public repositories. Set it through an environment variable or your development environment instead.
If the goal is simply to understand the concept before writing code, start with what an AI agent is. This guide focuses on turning that idea into a working Python project.
Start With One Job
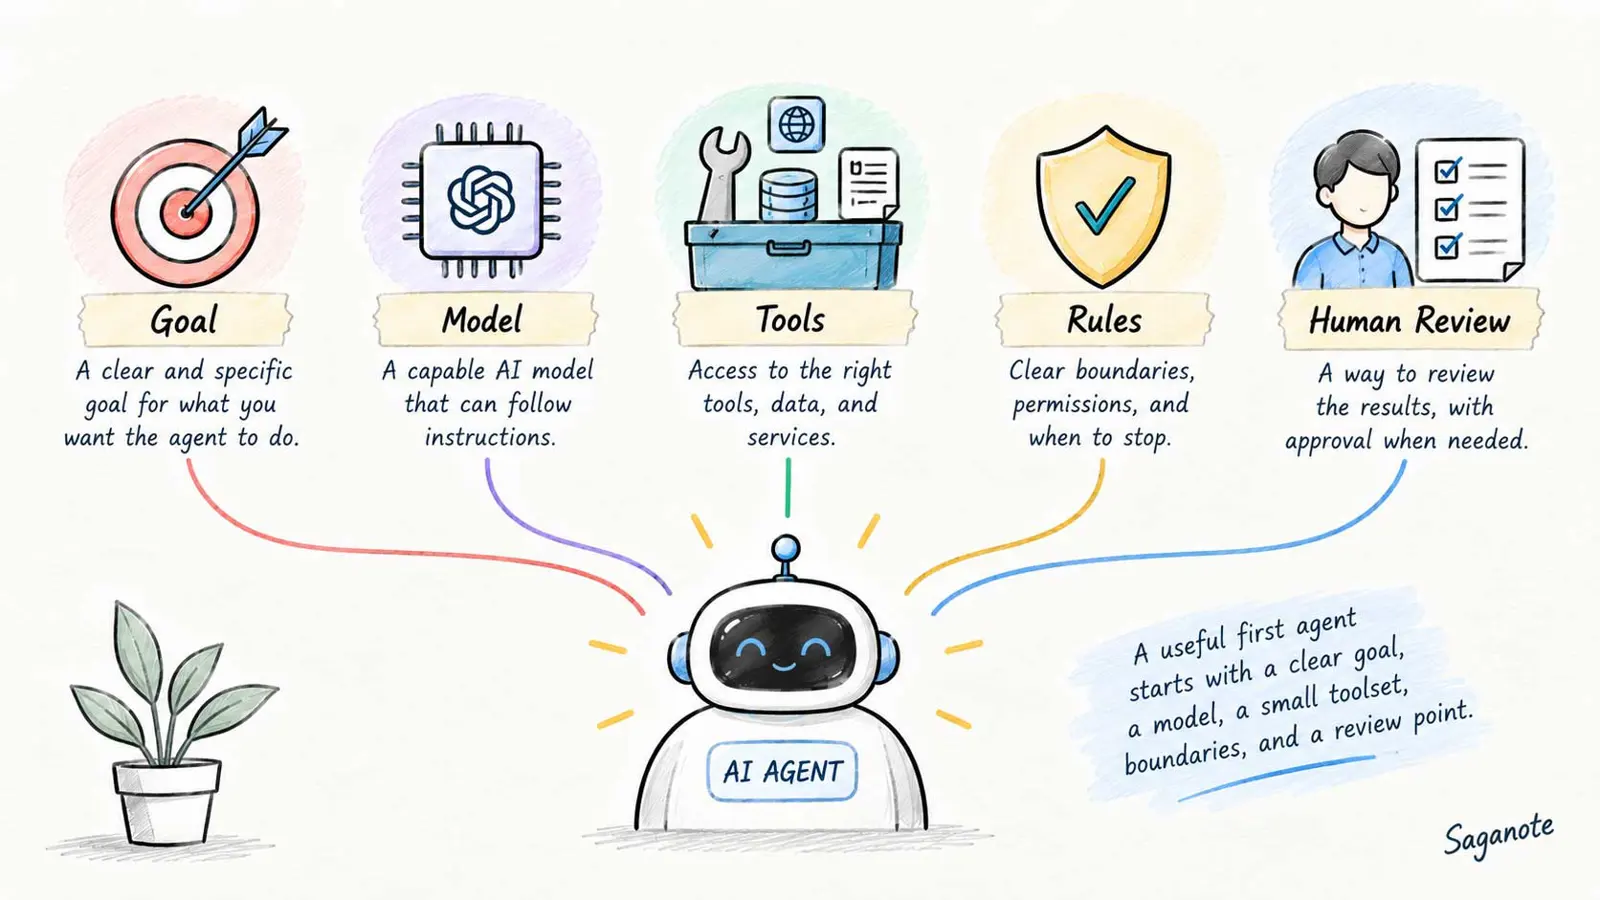
The easiest way to create an AI agent is to give it one job with a clear beginning and end. A request such as "help with anything" is difficult to test because there is no clear definition of success.
A better first project could research a question, classify incoming requests, organize a small set of documents, or prepare a draft report. Anthropic also recommends starting with the simplest system that can solve the problem and adding agentic complexity only when it improves the result.
Before writing code, define six things:
- Goal: What should the agent accomplish?
- Input: What information will it receive?
- Tools: What can it access?
- Output: What should it return?
- Stop condition: When is the task finished?
- Human review: Which actions require approval?
Create the Basic AI Agent
OpenAI's current Python quickstart uses an Agent with a name and instructions, then uses Runner to execute it. The SDK handles the run loop for you, so the first version does not need a large amount of orchestration code. Read the official OpenAI Agents SDK quickstart.
1. Create a project and install the SDK
Open a terminal and create a project directory:
mkdir my_ai_agent
cd my_ai_agent
python -m venv .venv
Activate the virtual environment.
- macOS or Linux:
source .venv/bin/activate - Windows PowerShell:
.venv\.Scripts\activate
Install the Agents SDK:
pip install openai-agents2. Set your OpenAI API key
Set the OPENAI_API_KEY environment variable in the terminal session you will use to run the agent.
export OPENAI_API_KEY="your_api_key_here"On Windows PowerShell, use:
$env:OPENAI_API_KEY = "your_api_key_here"Do not paste a real key into agent.py. The SDK reads the environment variable when the application runs.
3. Define the agent's job
Create a file named agent.py. Give the agent a narrow role and instructions that describe the task, expected answer style, and important limits.
import asyncio
from agents import Agent, Runner

agent = Agent(
    name="Research Assistant",
    instructions=(
        "Help research questions clearly and briefly. "
        "Separate confirmed information from uncertainty. "
        "Do not invent sources or facts."
    ),
)

async def main():
    result = await Runner.run(
        agent,
        "Explain why the sky looks blue.",
    )
    print(result.final_output)

if __name__ == "__main__":
    asyncio.run(main())
Run the program:
python agent.pyThat gives you a working baseline. The agent has a goal and instructions, but it does not yet have an external tool.
Give the Agent a Tool
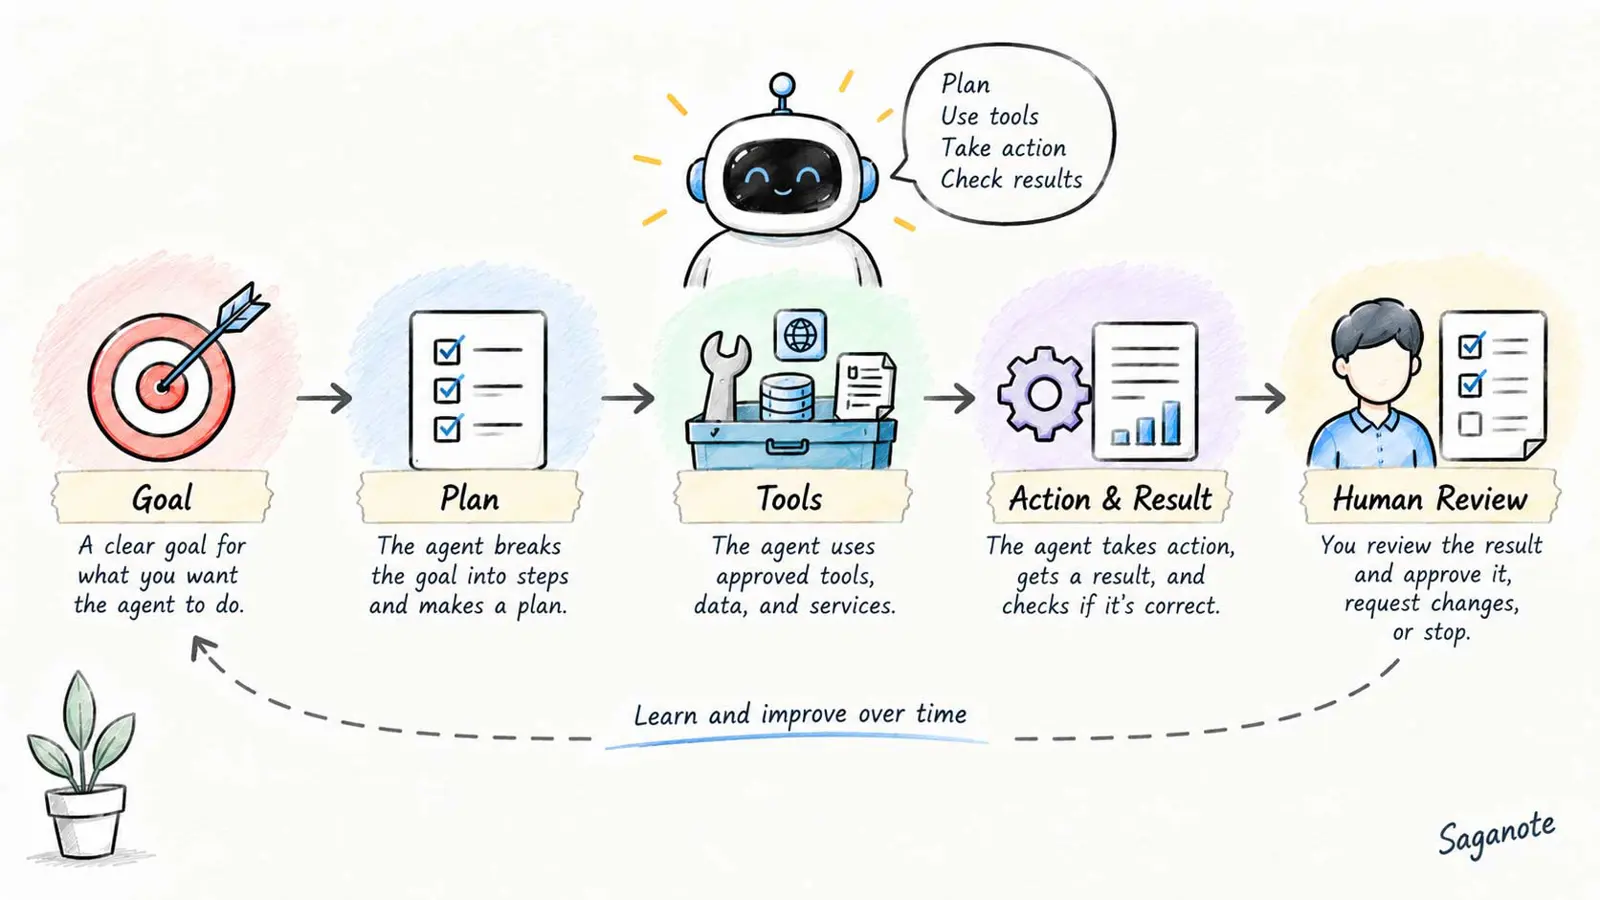
Tools let an agent interact with something outside the model. Depending on the application, a tool can search the web, retrieve files, query a database, call an API, or perform a controlled action.
The OpenAI Agents SDK supports hosted tools and local function tools. Its current Python documentation includes WebSearchTool, FileSearchTool, CodeInterpreterTool, and other tool types. See the official Agents SDK tools documentation.
For a first useful example, add web search so the agent can research a current question instead of relying only on information already available to the model.
import asyncio
from agents import Agent, Runner, WebSearchTool

agent = Agent(
    name="Research Assistant",
    instructions=(
        "Research the user's question using web search when current "
        "information is needed. Prefer reliable sources, separate "
        "facts from uncertainty, and give a concise answer."
    ),
    tools=[WebSearchTool()],
)

async def main():
    result = await Runner.run(
        agent,
        "What are the main changes in the latest Python release?",
    )
    print(result.final_output)

if __name__ == "__main__":
    asyncio.run(main())
The important idea is not the search tool itself. It is the pattern: give the agent a capability that directly supports the job you defined, rather than handing it a large collection of unrelated tools.
Set Clear Boundaries Before Adding More Tools
A tool is also a permission. If an agent can search, read, write, send, purchase, delete, or change something, that capability should be deliberate.
- Start with read-only tools when possible.
- Give the agent only the tools required for its job.
- Define what information it can access.
- State when it should stop.
- Require human approval before high-impact actions.
- Test failure cases before connecting real accounts or production data.
For a first project, a research or drafting task is usually easier to control than an agent that can send messages, modify records, or make purchases. Expand permissions only after the smaller workflow behaves as expected.
Turn the First Agent Into a Real Workflow
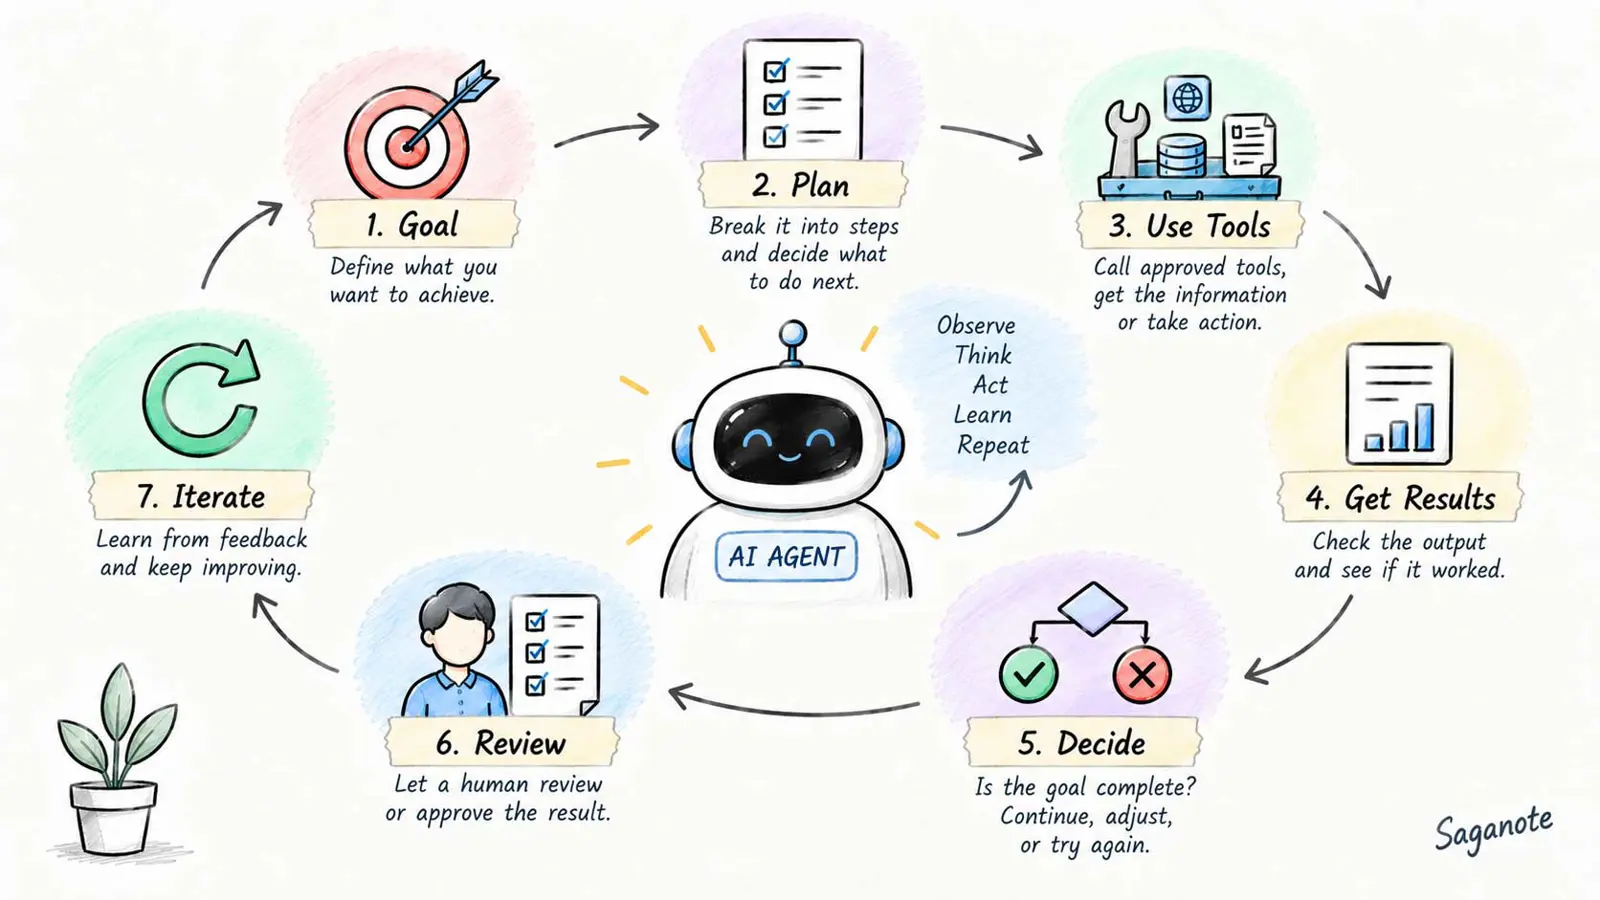
Once the basic agent works, describe the task as a loop:
- Receive the goal.
- Decide what information or tool is needed.
- Use an approved tool.
- Inspect the result.
- Decide whether another step is necessary.
- Produce the requested output.
- Stop or ask for human input when the boundary is reached.
OpenAI's current Agents SDK uses Agent plus Runner to manage agent turns, tool calls, and related execution behavior. The practical point is that the system can respond to what happened during the task instead of waiting for a completely new instruction after every step.
For a broader explanation of this shift, see what agentic AI means and how it works. You can also compare the approach with what a chatbot is.
Test the Agent Before Giving It Real Access
A successful first run does not mean the agent is ready to operate on real data or take real actions. Test the boundaries before expanding its permissions.
- Give it a normal request and check the result.
- Give it incomplete information and see whether it asks for what is missing.
- Give it conflicting information and check whether it reports the uncertainty.
- Ask for something outside its permitted task.
- Remove or break a tool and see whether the agent fails safely.
- Check the final output against the original goal.
- Review tool calls and unexpected behavior before connecting more capabilities.
Testing should cover the cases that matter to the task. If the agent will eventually update customer records, for example, test incorrect identifiers, missing fields, duplicate requests, and actions that should require approval before allowing access to the real system.
Troubleshooting a First AI Agent
The SDK will not install
Confirm that the virtual environment is active and that the Python version meets the SDK's current requirements. Then retry the installation with pip install openai-agents.
The program cannot find the API key
Check that OPENAI_API_KEY is set in the same terminal environment where you run python agent.py. If you opened a new terminal, activate the environment and set the variable again.
The agent gives an unreliable answer
Tighten the instructions, narrow the task, and add a tool when the task depends on information the model should retrieve rather than guess. Test several normal and edge-case requests before expanding the workflow.
Frequently Asked Questions About Creating an AI Agent
Frequently Asked Questions
Do I need a complicated system to create an AI agent?
Is an AI agent the same as a chatbot?
Should an AI agent act without approval?
Can I create an AI agent without Python?
Start Small, Then Expand the Agent
To create an AI agent successfully, start with one useful job rather than trying to build a system that can do everything. Define the goal, write clear instructions, add only the tools the task requires, and decide where human review belongs.
Once that small workflow is reliable, expand one capability at a time and test the new behavior before giving the agent broader access.